Tools
Import Wizard
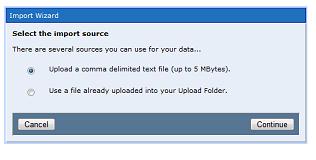
To import data to your database, first login as an administrator and go to ADMIN. Click on TOOLS, then WIZARDS and finally IMPORT WIZARD. This will open the following screen on the right of your screen:
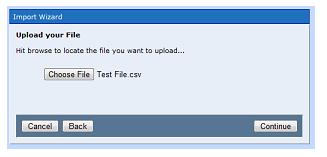
Here you can choose to UPLOAD a comma delimited file (CSV file) or use a file already uploaded, then click CONTINUE to get to the next screen:
Here click on the CHOOSE FILE button to pick the file to upload. Then click CONTINUE to proceed.
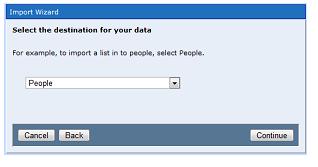
Here select which data group you'd like to import your file to, and click CONTINUE.
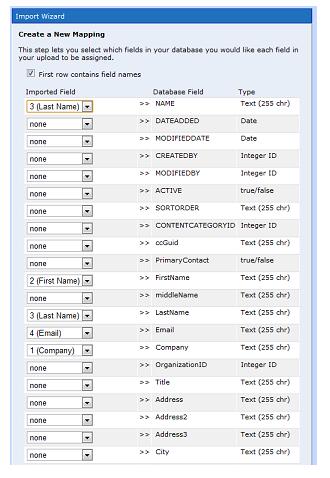
The above screen lets you match fields from the data you are importing to field names in the database into which you are merging the records. When you are done with all fields, click CONTINUE.
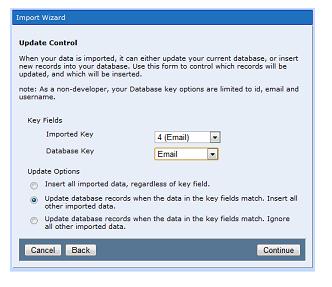
Here you decide if you want to create new records for all data imported regardless of whether or not a record is already in your database, or just update records when the imported key shows a record already in the database. Then click CONTINUE.
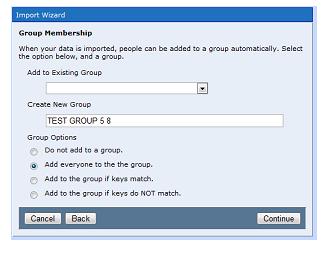
Here decide if you want to add the data to an Existing Group or CREATE a New Group. You also specify if you want to add all records, no records or only certain records to the group during import. Click CONTINUE.
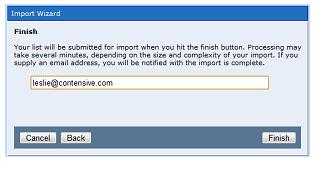
At this point specify an email address for the person who should be notified when the IMPORT is completed and click FINISH.
To see your group members when the import is completed (if you are importing PEOPLE), go to ADMIN HOME and click on MANAGE USERS and then PEOPLE. On the FILTERS, click on the group name that you IMPORTED to and all new users will be listed in that group.
Content File Manager
The Content File Manager gives administrators direct access to the content files on your web site. The Content File Manager is the primary file storage area for files, logs, and large text in your site.
Please note that you should not change anything in the content files without a full understanding of how each of these files relates to the content on your site. Always perform a full backup of your site, including your database, content files, and HTML files before managing your content files.
To access the Content File Manager, go to ADMIN > TOOLS > CONTENT FILE MANAGER
There is one special folder in the content files called "Upload". Any files in the Upload folder can be accessed directly on your site with the URL /Upload/filename.
The Upload folder is very useful when creating templates. For instance, if you use Adobe ImageReady, name your image folder "Upload". Then when you save the completed HTML template, all you have to do is upload your 'sliced' images to the Contensive Upload folder using the Content File Manager, and save the Adobe created HTML as your template.
