TCA 2015 New Site Features
Contents
- 1 Setting Up Pricing for Different Member Types
- 2 Uploading presentations from meeting sessions
- 3 Editing Content in the TOP BLOCK on the left top of the template
- 4 Editing Content in the FEATURED CONTENT Block
- 5 Editing Content in the Left Side Box on the Page Tier Template
- 6 Enabling Comments on Specific Pages
- 7 Editing the Slider in the Upper Right Box
- 8 Page Templates Available
- 9 Meeting Surveys
- 10 Notes from TCA on Account Setup
- 11 Setting the Section Background Image
Setting Up Pricing for Different Member Types
To edit pricing, login and click on ADMIN, Manage Add-Ons and then TCA Membership Application.
Next, click on the type of dues you are interested in:
- Associate Dues
- For Hire Dues
- Private Fleet Dues
- School Dues
Click on the dues level you want to edit, make changes and then click OK to save changes.
Uploading presentations from meeting sessions
To upload a presentation from a specific meeting session, login and click ADMIN, Manage Add-Ons, TCA 2015 Call for Presenters, and TCA Session Submissions.
Click on the paper/pencil icon next to a submission to upload the handout.
In the field Attachment Session File, click the BROWSE button to upload the presentation.
Click OK to save changes.
Users can download the presentations by going to the TCA Meetings Proceedings page and clicking on the meeting and then the session for the presentation they want to access.
Editing Content in the TOP BLOCK on the left top of the template
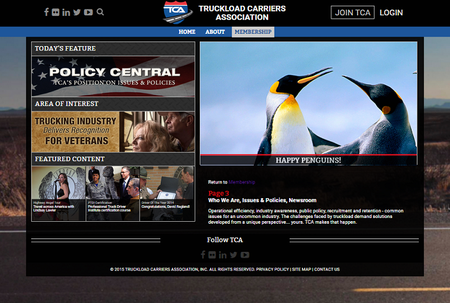
The information that appears in these blocks is set in the page content record in the TOP BLOCK TITLE, BLOCK BACKGROUND IMAGE, and Block Type (Document, Link or Video).
In the DISPLAY tab of the page record you will see the following fields:
TOP BLOCK TITLE: Appears in the title in the block at the top left of the page.
BLOCK BACKGROUND IMAGE: Appears as the image background in the block at the top left of the page. (480px x 120px)
BLOCK TYPE: Can select document, link, video or none. Will show an icon as specified.
On the pages with the template that includes this block, when you are in EDIT mode, there is a select list drop down that allows you to pick 2 pages from the child pages of the section that populate the two boxes. You can also choose to show content from the entire site by clicking the box next to “List all Site Pages”. Click SAVE to save your changes.
Editing Content in the FEATURED CONTENT Block
This content appears in the box directly below the Top Block box. On any page that has a template with this content included, turn on EDIT and you will see drop downs for left, center and right content in the boxes under FEATURED CONTENT. On this page, when you are in EDIT mode, there is a select list drop down that allows you to pick 3 pages from the child pages of the section that populate the three boxes. You can also choose to show content from the entire site by clicking the box next to “List all Site Pages”. Click SAVE to save your changes.
To change what displays in the boxes, go to the page and edit it as follows:
In the DISPLAY tab of the page record you will see the following fields:
FEATURED TITLE: Appears below the image in FEATURED CONTENT block.
FEATURED DESCRIPTION: Appears below the title in FEATURED CONTENT block.
FEATURED BACKGROUND IMAGE: Appears as image in FEATURED CONTENT block. (300 x 300)
FEATURE TYPE: Can select document, link, video or none. Will show an icon as specified.
PAGE IMAGE: Appears on the right top box of the page when the Page Template with One Picture template is selected for the page. (300 x 300)
PAGE CAPTION: Appears under the image in the right top box of the page when the Page Template with One Picture template is selected for the page.
Editing Content in the Left Side Box on the Page Tier Template
To add text to this block turn on EDIT and click on the paper/pencil icon. You can add text and images here; click OK to save changes. To specify whether it is page or section specific, turn on ADVANCED EDIT, click the Wrench, make your selection and click UPDATE to apply changes.
Enabling Comments on Specific Pages
To turn on the comments feature for a specific page, edit the page in the FEATURES tab. Check the box next to “Allow Comment Display” and/or “Allow Anonymous Comments”. Click OK to save changes.
Editing the Slider in the Upper Right Box
To update the slider, login and click on ADMIN > MANAGE ADD-ONS > TCA 2015 DESIGN > TCA HOME SLIDER. Click ADD to add new images or click on the paper/pencil icon next to one to edit it.
NAME: Record name
SLIDER IMAGE: The image that appears; should be 640 x 360.
SLIDER CAPTION: Text that appears under the image.
SLIDER PAGE LINK: Drop down of all site pages available to link to.
SLIDER EXTERNAL LINK: If SLIDER PAGE LINK is set to none, this is the URL for the external link.
SLIDER ORDER: The order in which the slide will appear.
Page Templates Available
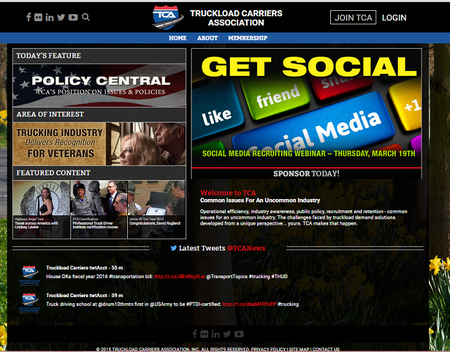
Home Page
Includes Top Block Section, Featured Content, Slider, Content box and Twitter Feed.
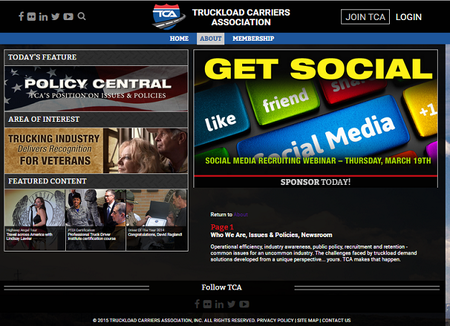
Page Template with Slider
Same as home page without the TWITTER feed.
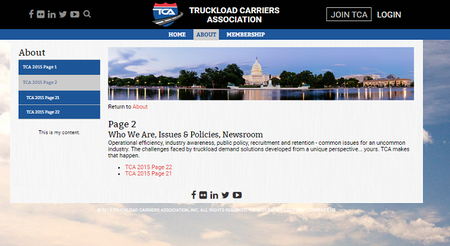
Page Tier Template
Section menu on left and copy content on left; also includes page banner and content box.
Page Tier Full Template
Include a copy content box only.
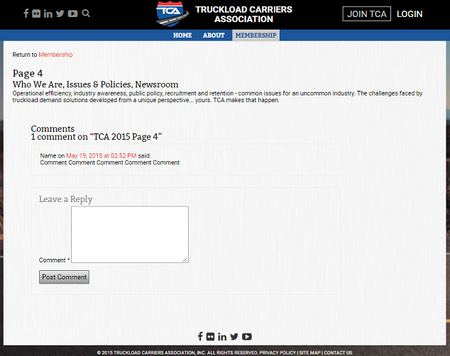
Page Template with One Picture
Same as Page Template with Slider but only displays one picture; the picture for this page is set up in the page record in the DISPLAY tab in the Page Image and Page Caption fields.
Meeting Surveys
By clicking on a meeting session, users can fill out a meeting survey after attending a meeting. Each survey is unique to a speaker and presentation. The user can choose a rating of 1-5, or N/A (1 lowest - 5 highest). All answers get added and averaged, N/A doesn't count against average. The compiled rating then saves to the session submission record, for inclusion in the library of speakers.
To access filled out surveys, login and click on MANAGE ADD-ONS > TCA 2015 APPS > SESSION SUBMISSIONS SURVEY DETAILS. Click on one and in the Survey tab you will see details for that survey.
Notes from TCA on Account Setup
Set up membership bills to automatically be sent 90 days before expiration of account and set to bill and fulfill on payment. (We set this up in MANAGE ADD-ONS > ECOMMERCE > ECOMMERCE SETTINGS in the Details tab in the field “Prebill Days for Billing Accounts”.)
Each membership type will be placed in a different group. (We set this up in MANAGE ADD-ONS > MEMBERSHIP MANAGER > MEMBERSHIP MANAGER. Go to the Membership Types tab and click on a type. Under the Membership tab, the field Group is set for each membership type.)
Members will have 120 days grace period where they are still recognized as a member but do not get any member privileges. (We set this up in MANAGE ADD-ONS > MEMBERSHIP MANAGER > MEMBERSHIP MANAGER. Go to the Settings tab; we entered 120 in the field “Membership Cancellation Grace Period”.)
Setting the Section Background Image
To set the background image that will display for the section, login and click EDIT. Next click the paper/pencil icon in the menu for the section you want to modify. Click the DISPLAY tab. Upload the image in the BACKGROUND IMAGE field. (720 x 480) Click OK to save changes.